 Skip to main content
Tips for Installing Origin Windows

Alexandra works in the marketing department, and in 2014, bought her first house, which turned out to be somewhat of a ‘project’. Since then, the whole house has needed renovating, which has helped her gain a knowledge of basic DIY, decorating and making the best of a small space.
Apertures
Open cavities discovered between the inner and outer skins of brick or block work should be bridged or closed with an insulation material in accordance with the local building authority.
Installation
Windows should be installed in the aperture without twisting, racking or distorting.

1. Frame Fixing

Fig 1
Measure the opening, checking it fits with all measurements on your Origin paperwork.
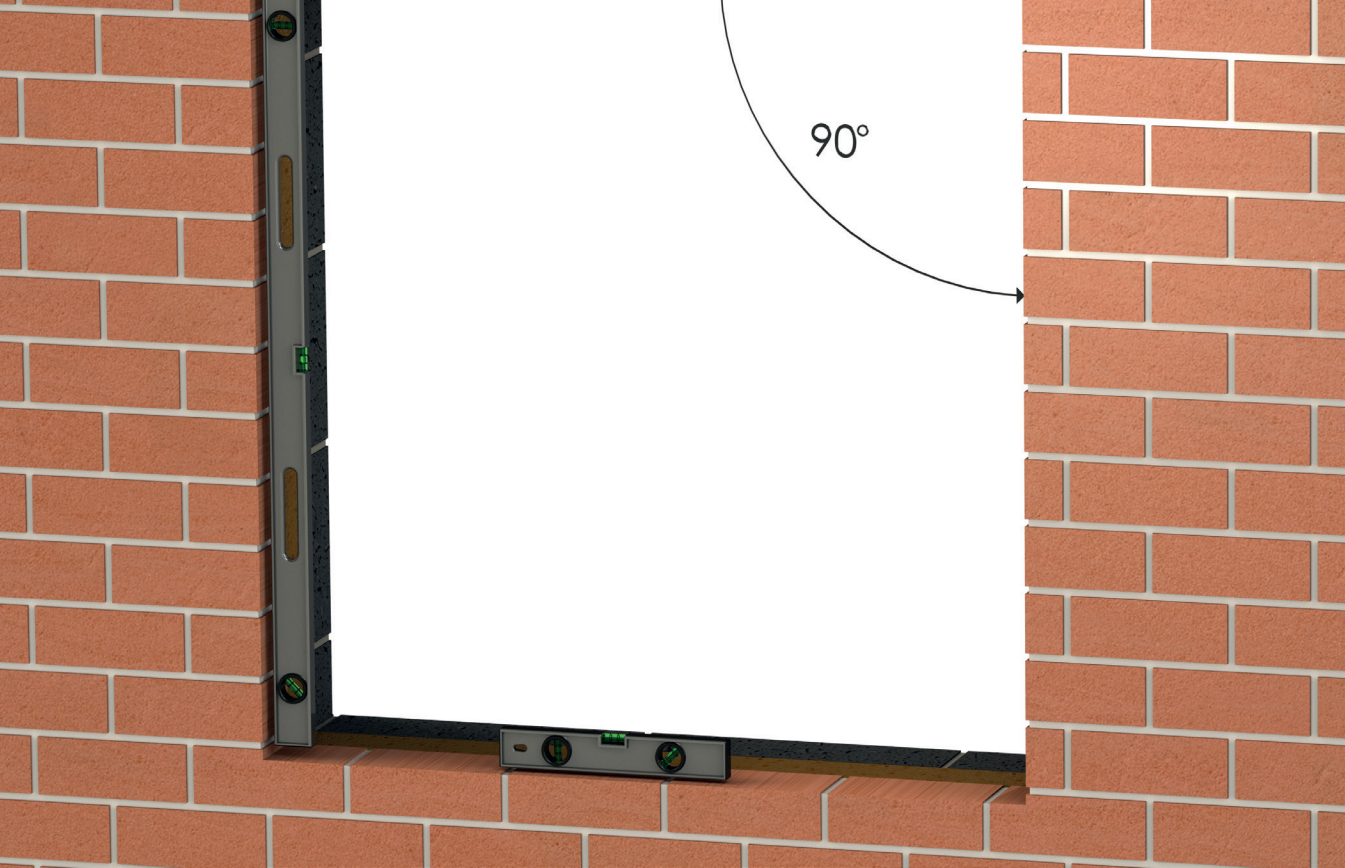
➤ 1.1. Place the correct frame packers spaced at a maximum of 500mm apart along the length of the opening to create a level, well supported platform for the track/cill to sit. (Fig.1)

Fig 2
➤ 1.2. Using an appropriate silicone sealant, fill the ends of the cill section & install the end caps. (Fig.2)
➤ 1.3. Place the cill on the pre prepared frame packers and re-check for level. Adjust if necessary. (Fig.2)
➤ 1.4. Using a silicone sealant, seal the drainage channels adjacent to the brickwork. (Fig.2)
➤ 1.5. Run a bead of sealant along the up-stand of the cill. (Fig.2)

Fig 3
If using fixing straps, please skip to 1.7.
➤ 1.6. Place the window on the cill and secure into position. Wherever practical, all four corners of the frame should be secured as follows:
- Frame fixing should be between 100mm to 150mm from the external corners.
- Fixings should be at no greater than 600mm apart and there should be the minimum of two fixings on each jamb. On windows over 1800mm wide, central head and cill fixings should be provided. (Fig.3)
Please move to 2.1.
➤ 1.7. Secure the fixing strap into the rebate of the window with the screws provided. All four corners of the frame should be secured wherever practical.

Fig 4

Fig 5
➤ 2.1. All insulated glass units should be examined for damages and defects before installation. (Fig.4)
➤ 2.2. Close the window and fully engage the lock. (Fig.4)
➤ 2.3. Remove the 4 glazing beads. (Fig.4)
➤ 2.4. Place the required packers in the bottom of the glazing chamber spaced approximately 50mm in from each corner at 90° to the window. (Fig.4)
➤ 2.5. Install the glass on the packers, taking care not to pinch the gasket on the outside. (Fig.4)
➤ 2.6. For safety, always ensure the top bead is installed first, followed by the bottom and then the side beads. (Fig.5)
➤ 2.7. Cut the glazing wedge gasket to length and insert between the glass unit and the glazing bead. (Fig.5)

Fig 6
➤ 3.1. Wherever practical, windows should be foam filled to stop air flow around the window and the surrounding aperture. (Fig.6)
➤ 3.2. If required, use trims to bridge the gap between the window and the aperture. All trim should be compatible with the material of the frame and should be colour matched where specified. (Fig.6)
➤ 3.3. The sealant should be applied against a firm backing so that it is forced against the sides of the joint during application. Best practice is to have insulating foam fill inserted wherever practical. (Fig.6)